
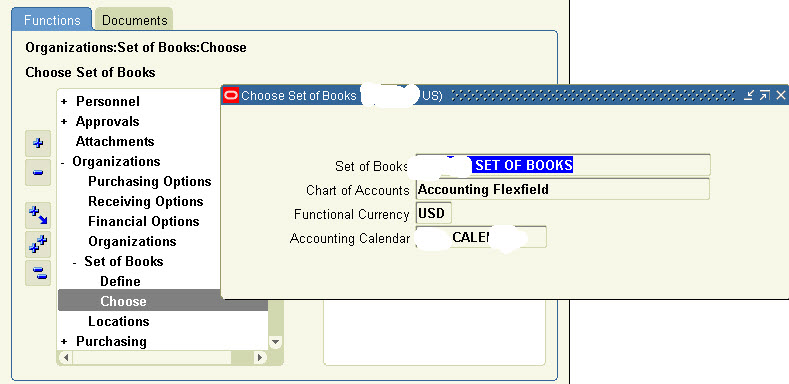
Step 1 - Choose Setup of Books (This is the most important setup and can not be undo once setup. So, pay special attention while doing this setup)
Choose the Correct Setup of Book name. Once setup, this can not be changed. So, be very careful while choosing the set of book name.
Step 2 - Setup Purchasing Options
Receipt Accounting (Key fields)-
Accrue Expense Items ("Period End")
AP Expense Accrual account -Liability account type
Accrue inventory items (Here it has been set up as "At Receipt")


Step 2 - Setup Purchasing Document Types
For more details on each field, you can go to the help screen of this page.
Security level - This option gives you control to set at which level you want this document to be accessible.

Step 3 - Setup Purchasing Approval Groups
Define the approval groups for your documents.
Document total -Enter the $ limit for this approval group.
Account range -Enter the same $limit and complete account range starting from 000 to ZZZ for all segments.

Step 4 - Assign PO Approval Groups to Job or Position depending upon setup in Purchasing options
Assign the approval groups defined in step 3 to Jobs / Positions (depending on the Purchasing options/ Human resources setup).

Step 5 - Setup Buyers
Setup new Buyers.

Step 6 - Setup Inventory items or/and Purchasing categories
Setup Purchasing Categories/Inventory items (if you have Inventory setup, optional) to be used while creating POs.

Step 7 - Define Default accounts for Purchasing categories (Optional)
This is an optional setup. If setup then when a purchasing category is chosen while creating the PO, the charge or expense account automatically gets defaulted to the PO at PO distribution level. Work with your business users to get the default accounts for each category to set this up.

Step 8 - Define any custom PO Line types (Optional)

That concludes Purchasing setup. You can now create POs.

No comments:
Post a Comment